Installation of MYOB Accounting Plus v18
Note!
This page is dedicated for MYOB Accounting Plus v18,
not for other software versions.
These installation instructions detail how to install
MYOB Accounting Plus v18 using the file downloaded
from Perdisco. If you obtained a copy of your MYOB software by other means,
refer to the instructions that came with your copy of your MYOB software
to install the software on your computer.
Remember, installing MYOB Accounting Plus v18 requires:
Windows® XP, Windows Vista® or Windows® 2000.
MYOB Accounting Plus v18 does not run on Macintosh or other non-Windows operating systems.
Before you start - have you closed all open applications?
So that your MYOB software installs correctly, you need to exit all applications
before you start the installation process. You may wish to print this page so you have
access to these instructions during the installation process.
Installing MYOB Accounting Plus v18
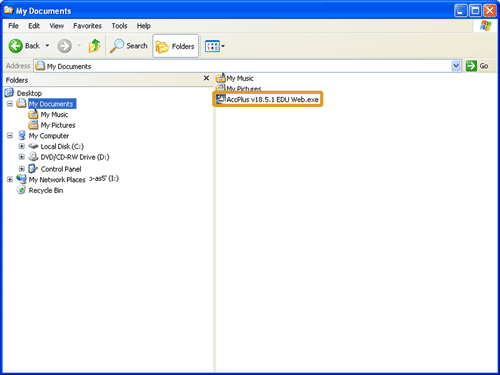
Step 1:
Locate the file 'AccPlus v18.5.1 EDU Web.exe' that you downloaded from Perdisco. The image below
shows this file downloaded into the 'My Documents' folder, but you may have
saved your file into another folder.
Double click that file.
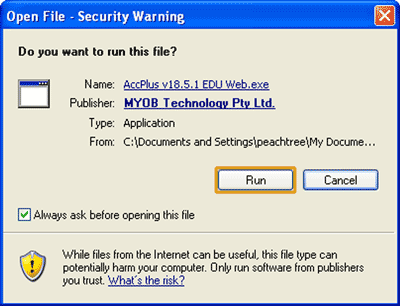
Step 2:
The InstallShield Wizard will run and then display the
following security warning. Click 'Run'.
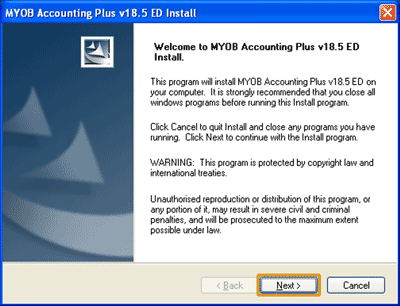
Step 3:
The following window will appear. Ensure you have closed all open applications and windows except the
MYOB Accounting Plus v18.5 ED Install window.
Then, click Next.
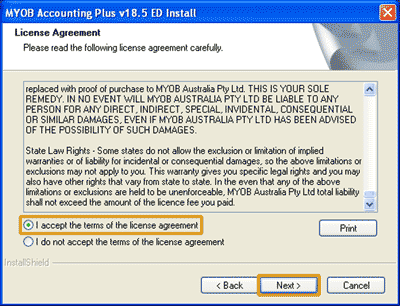
Step 4:
Read the terms of the license agreement.
If you agree with the terms of the license,
select 'I accept the terms of the license agreement' and then click
Next. If you do not agree with the terms of the agreement,
select 'I do not accept the terms of the license agreement' to exit the installation process.
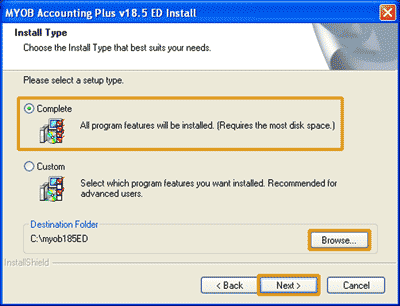
Step 5:
Select whether you wish to install all features of your MYOB software
or if you wish to customise the installation.
If you are completing our software practice set
we recommend you chose the Complete option to install all features of your MYOB software.
Then, select the folder in which your MYOB software is to be installed. You may accept
the folder suggested to you or click the Browse button to select an alternative destination (such as
C:\Program Files\MYOB).
Make a note of where you install your software in case you need to access these files in the future.
Once you have made your selections, click Next.
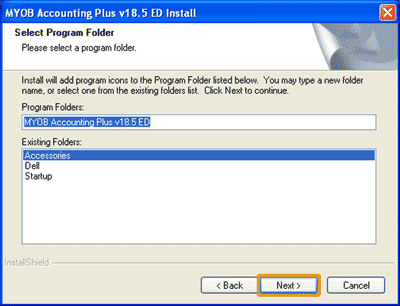
Step 6:
Select the Program Folder to which the program icons are to be added. Click Next.
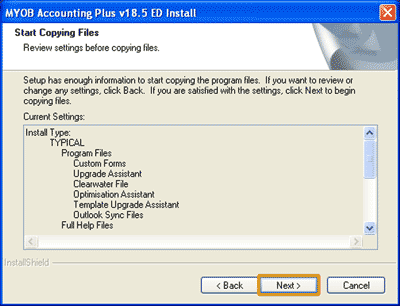
Step 7:
Review your selected settings. Use the Back button if you wish to change any of the settings,
otherwise click Next to begin the installation process.
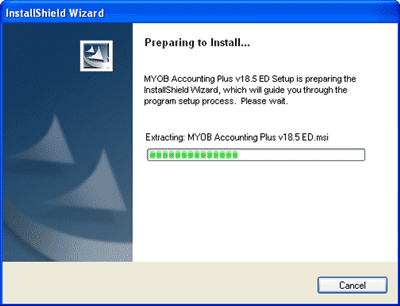
Step 8:
Your MYOB software will then begin to install. This process may take some time.
You will know when the installation process is complete when you see the following message.
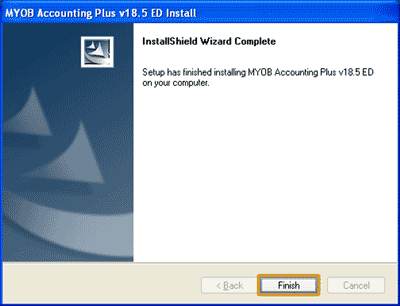
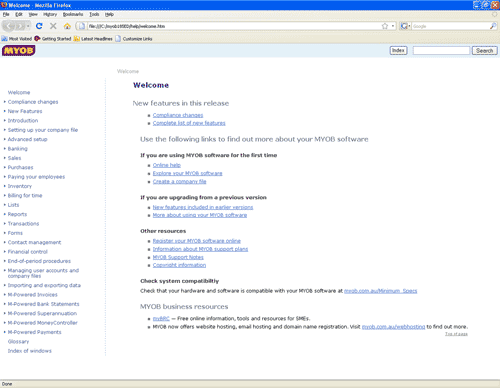
Click the Finish button to close the InstallShield Wizard. A web browser will then open to
the Welcome page of the 'Online help' feature that is installed with your MYOB software.
You may browse the topics in this feature or close your web browser.
A very helpful hint!
At any time you may access the 'Online help' feature that comes with your MYOB software.
When you are in your MYOB software and you wish to view the help
for a window you have open, simply press the <F1> key on your keyboard.
This opens up a web browser to the page that displays information on the window that you
were currently using in your MYOB software when you pressed <F1>.
Now that you have installed your MYOB software, you are probably keen to open it and have a look.
A great place to start is by reviewing our
Exploring your MYOB software page in the
Getting started section of this learning centre.
Remember, when using your MYOB software you should regularly back up
your company file. The Back up your company files
topic in this section of the learning centre
will show you how.
You will also find instructions on how to
Restore your company files in case you ever need to do this.
While these sections may not mean much to you now, you should remember to come back and review
them after you have entered a few transactions into your MYOB software. If you ever need to
restore your company file you will be thankful that you did!
Please note: Apart from the installation instructions provided on this page,
Perdisco cannot provide installation
or technical support for your MYOB software. For further assistance with your MYOB
software, please contact your lecturer.
Additional information for students outside Australia
If you are a student who is completing our software practice set, you will be required to
enter information in Australian dollars into your MYOB software and into the practice set website.
Since your MYOB software will use the currency set in your Windows operating system, you will need
to change the settings in your operating system if it is not already set to use
Australian dollars. For instructions on how to change the currency and date formats of your
Windows operating system, visit the Change the system currency and date format
page of this Learning Centre.
Return to the top